Connect Multiple Devices on the Same LAN
What You’ll Set Up
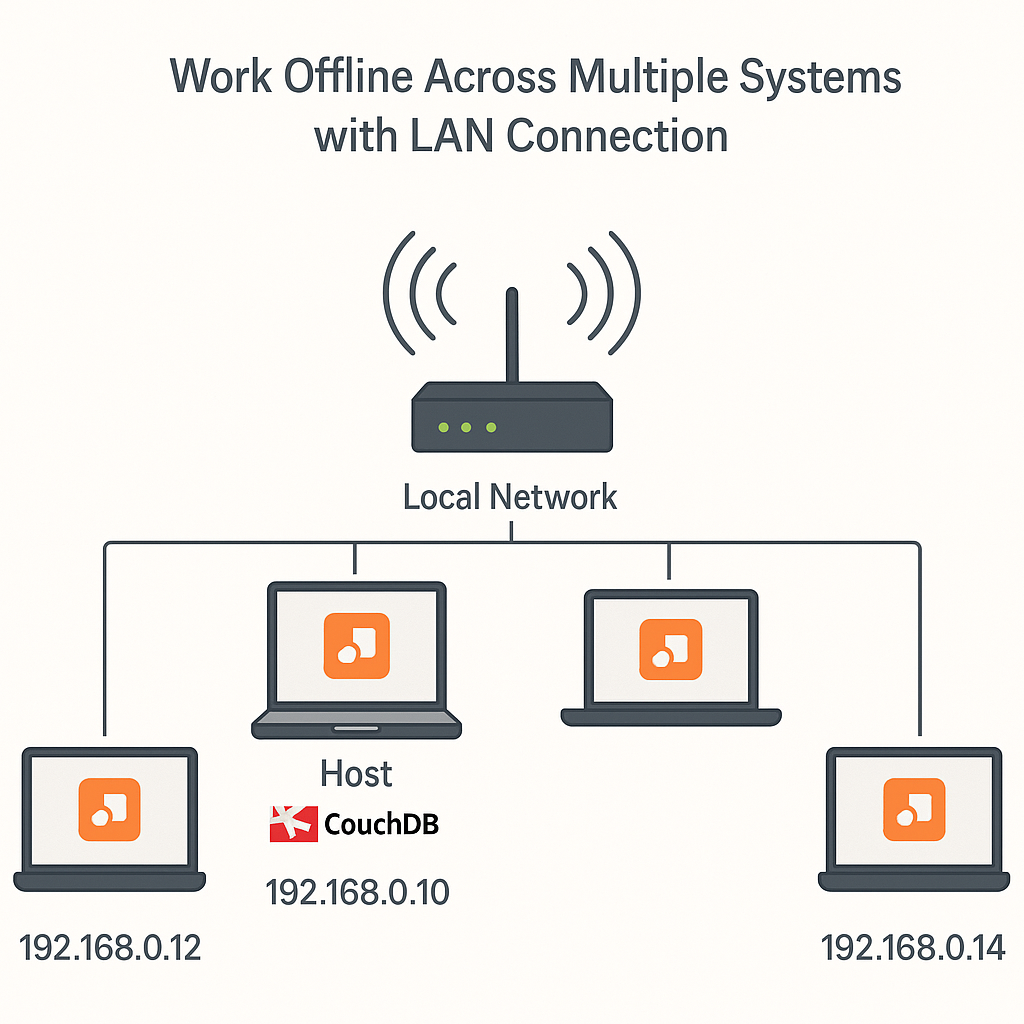
You’ll connect any number of devices (Windows, Mac, Linux, Android, iOS, POS terminals) to the same Perfect Management System account on your local network by pointing them to a single CouchDB “host” machine.
Prerequisites
Recommended Network Topology
Choose Your Host Device
Connect All Devices to the Same Network
ipconfig
• Mac:
ifconfig
• Linux:
ip a
• Phones: Wi‑Fi details.
Find the Host Device’s LAN IP Address
cmd
, press Enter.
ipconfig
.
192.168.0.3
).
ifconfig
.
en0
/
en1
, note
inet
(e.g.,
192.168.0.15
).
ip a
.
192.168.0.10
).
Configure CouchDB to Accept LAN Connections
By default, CouchDB only listens to
127.0.0.1
(localhost). You must change this so it listens on all network interfaces. Edit the
local.ini
file and set
bind_address
to
0.0.0.0
.
C:\Program Files\Apache CouchDB\etc\local.ini
or
C:\CouchDB\etc\local.ini
[chttpd]
section, change:
bind_address = 127.0.0.1
→
bind_address = 0.0.0.0
sudo nano /opt/couchdb/etc/local.ini
[chttpd]
, change
bind_address = 127.0.0.1
to
0.0.0.0
.
CTRL+O
) and exit (
CTRL+X
).
sudo nano /opt/couchdb/etc/local.ini
bind_address
in
[chttpd]
to
0.0.0.0
.
Restart CouchDB
After changing
bind_address
, restart CouchDB to apply the changes.
net stop "Apache CouchDB"
net start "Apache CouchDB"
sudo systemctl restart couchdb
Allow CouchDB Through the Firewall (Port 5984)
CouchDB uses TCP port
5984
. This must be open for other devices to connect.
- Open Windows Defender Firewall .
- Go to Advanced settings → Inbound Rules → New Rule .
- Select Port → TCP → 5984.
- Allow connection for all profiles.
- Name it CouchDB .
- Go to System Settings → Security & Privacy → Firewall.
- Open Firewall Options .
- Add Apache CouchDB and allow connections.
sudo ufw allow 5984/tcp
sudo ufw reload
Test CouchDB Access from Another Device
From any client device on the same network, open a browser and enter:
Replace
with the LAN IP of your host (e.g.,
192.168.0.3
). You should see the CouchDB Fauxton dashboard.
Configure the Perfect Management System on Client Devices
Once your host is ready, each device must be pointed to the host’s CouchDB server. These instructions apply to any Perfect Management System — Pharmacy, Patient, Ward, Inventory, Billing, Rota, etc.
- Open the Perfect Management System app.
- Go to Settings → Database Settings .
-
Set Server URL to:
http://
:5984 - Enter your CouchDB username and password.
- Save settings and restart the app.
- Launch the Perfect Management System app.
- Go to Settings → Database Settings .
-
Enter the host URL as above, replacing
- Fill in your CouchDB login credentials.
- Save and restart the application.
- Open the Perfect Management System application.
- Go to Settings → Database Settings .
-
Input
http://as the Server URL.:5984 - Provide the CouchDB username and password.
- Save changes and restart the app.
- Ensure the device is on the same Wi-Fi as the host.
- Open the Perfect Management System app.
- Navigate to Settings → Database Settings .
-
Enter the Server URL
http://and credentials.:5984 - Save and restart the app.
- Connect to the same Wi-Fi as the host.
- Launch the Perfect Management System app.
-
In
Settings → Database Settings
, enter:
http://
:5984 - Provide CouchDB credentials and save.
- Restart the app to apply changes.
Connecting More Than Two Devices
You can add as many client devices as your network can handle. Simply repeat the client setup steps for each additional device.
- Use a wired Ethernet connection for the host.
- Ensure Wi-Fi clients have strong signal strength.
- Limit heavy background downloads during operation.
- Only allow trusted devices on the LAN.
- Set a strong CouchDB admin password.
-
Regularly check
_usersdatabase for unknown accounts.
Troubleshooting
| Problem | Possible Cause | Solution |
|---|---|---|
| Cannot connect from client device | Wrong IP or different subnet | Verify host IP and ensure all devices share first three IP octets |
| Timeout when connecting | Firewall blocking port 5984 | Check and allow inbound TCP port 5984 on host |
| Works locally but not remotely |
bind_address
still set to
127.0.0.1
|
Update to
0.0.0.0
and restart CouchDB
|
| Data syncing slowly | Weak Wi-Fi signal or network congestion | Use wired connection for host, improve Wi-Fi coverage |