The core strength of the Perfect Hospital Bed Management System lies in its interactive floor plan , where beds and wards are represented graphically. This section will guide you through managing wards, adding and positioning beds, and maintaining accurate bed statuses.
🧱 A. Understanding the Ward View Layout
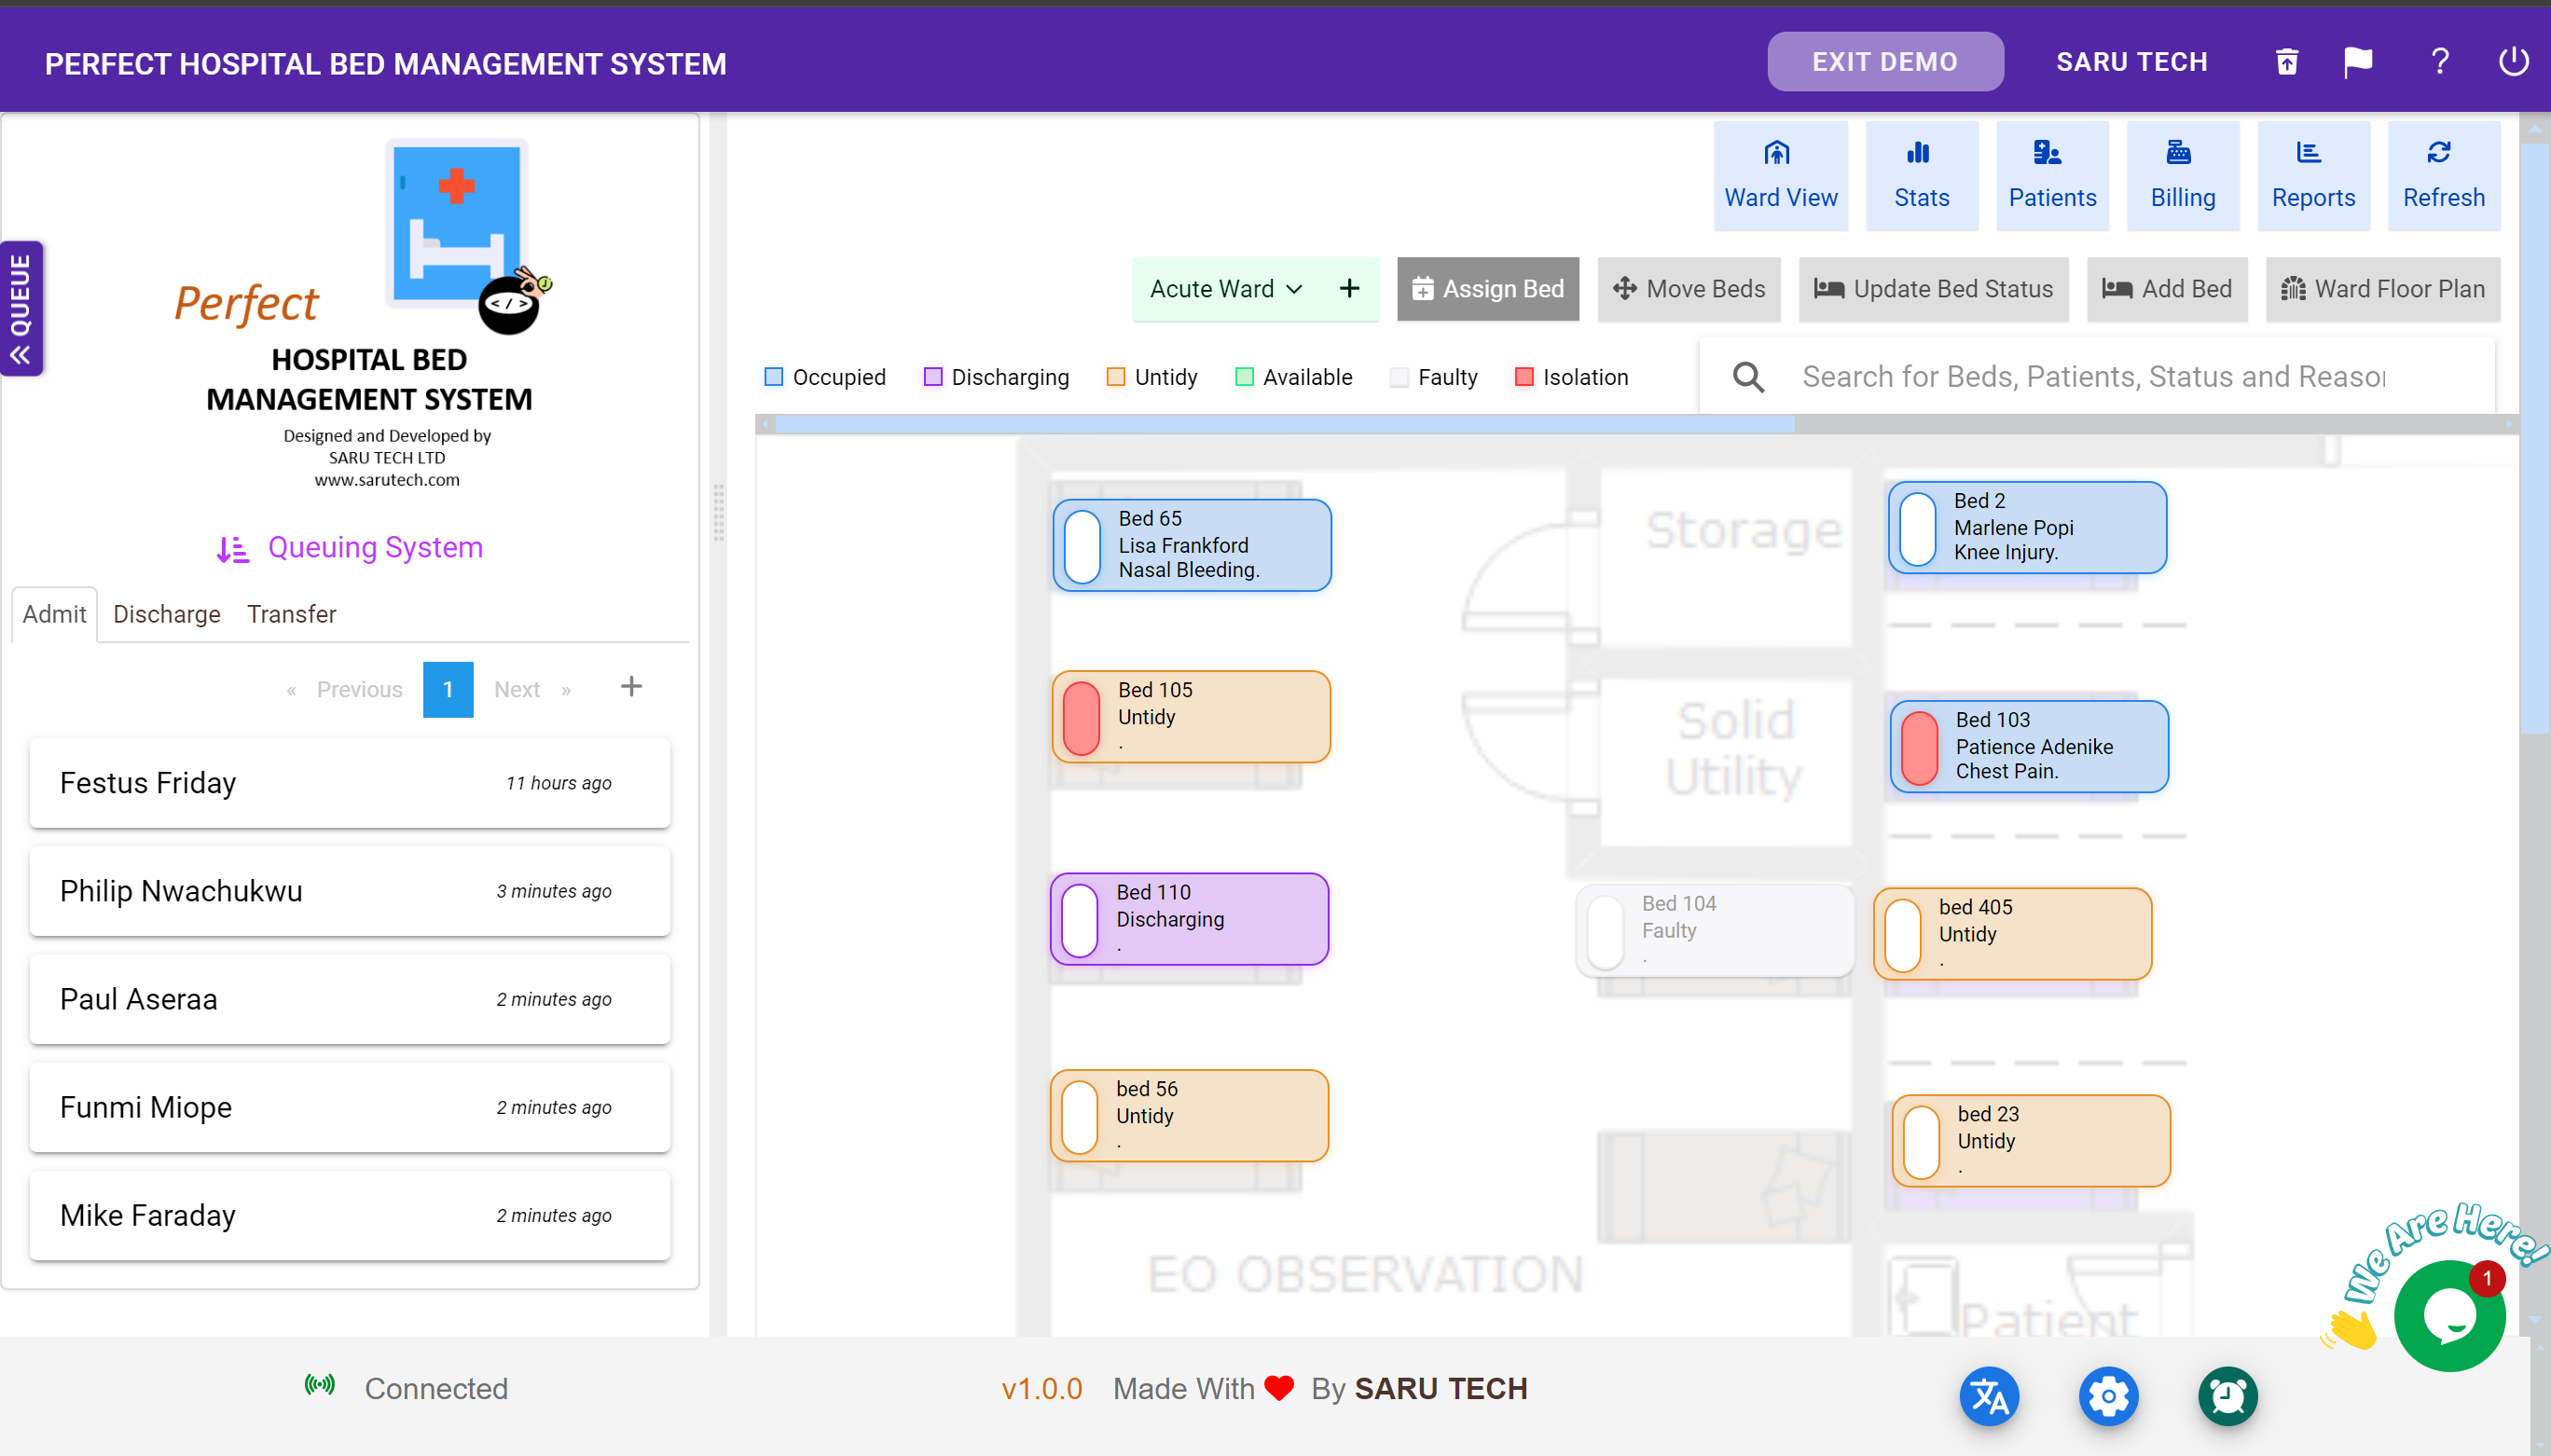
When you select a ward, its floor layout appears in the main canvas area. Each bed is shown as a colored rectangle with:
- Bed name (e.g., Bed A1)
- Status (e.g., Available, Reserved, Untidy)
- Patient name if assigned
- Description of the Patient Illness (if applicable)
You’ll also see a legend at the top-left showing what each color means:
| Color | Meaning |
|---|---|
| 🟩 Green | Available bed |
| 🔴 Red | Reserved |
| 🟧 Orange | Untidy – needs cleaning |
| ⚫ Gray | Faulty or Out of Service |
| 🟨 Yellow | Discharging (being vacated soon) |
| 🟪 Purple | Isolation (applied as an overlay) |
🏢 B. Selecting and Switching Between Wards
To select a ward:
- Use the ward dropdown in the toolbar.
- All existing wards will be listed.
- Once selected, the layout and bed statuses update instantly.
To add a new ward :
- Click the ➕ icon beside the dropdown.
- Fill in the ward name in the popup form.
- Save to create the new ward entry.
🧠 Tip: Set up all your wards first before designing the bed layouts.
➕ C. How to Add Beds to a Ward
To create new beds and position them on the floor plan:
- Click on the “Add Bed” button on the top toolbar.
- Then click anywhere on the canvas to place the new bed.
-
A form appears to input:
- Bed name (e.g., Bed A12)
- Isolation flag (optional)
- Initial status (Available, Reserved, etc.)
- Save the bed.
You’ll now see the bed appear on the map and in statistics.
🎛 D. Dragging & Positioning Beds
To reposition beds on the layout:
- Select “Drag” mode from the toolbar.
- Click and drag the bed to the desired location.
- Beds are bound within the ward area and won’t overlap with others.
🔁 E. Rotating Beds
To rotate a bed:
- Click on a bed to select it.
- Switch to “Rotate” mode in the toolbar.
- Use the rotation knob or manually enter the angle in degrees (0–360°).
- Click the Save icon to apply the rotation.
This helps orient beds according to your actual ward layout.
🖼 F. Uploading and Adjusting Ward Floor Plan
To enhance the realism of your layout:
- Click on “Floor Plan” in the toolbar.
- Upload an image (JPG/PNG) that represents the ward layout.
- Enter the width and height in pixels to resize the canvas appropriately.
- Save changes.
The beds will now sit on top of your real hospital layout, aiding visual clarity.
🛠 G. Changing Bed Status
To update a bed's current condition:
- Click “Update Bed Status” mode.
- Select the bed on the map.
-
Choose from:
- Available
- Occupied
- Untidy
- Faulty
- Reserved
- Discharging
Each change updates the statistics, and some statuses (like “Occupied”) can only be set through admission.