This is your daily control center for managing stock. It’s where most inventory activities begin — whether you're transferring gloves to another store, dispensing medication, or checking for low-stock items.
🏪 Switching Between Stores
If your organization has multiple stores (e.g., Main Store, ER Pharmacy, Surgical Store), this feature lets you switch views and operate within a specific store context.
Users can:
- Select which store they are working in
- Filter product visibility by store
- Run transfers and stocktaking only for the selected store
Example: You're in the Emergency Room Pharmacy. You select it from the store switcher and only see relevant inventory — no items from the surgical theatre or general store.
🔍 Viewing & Searching Products
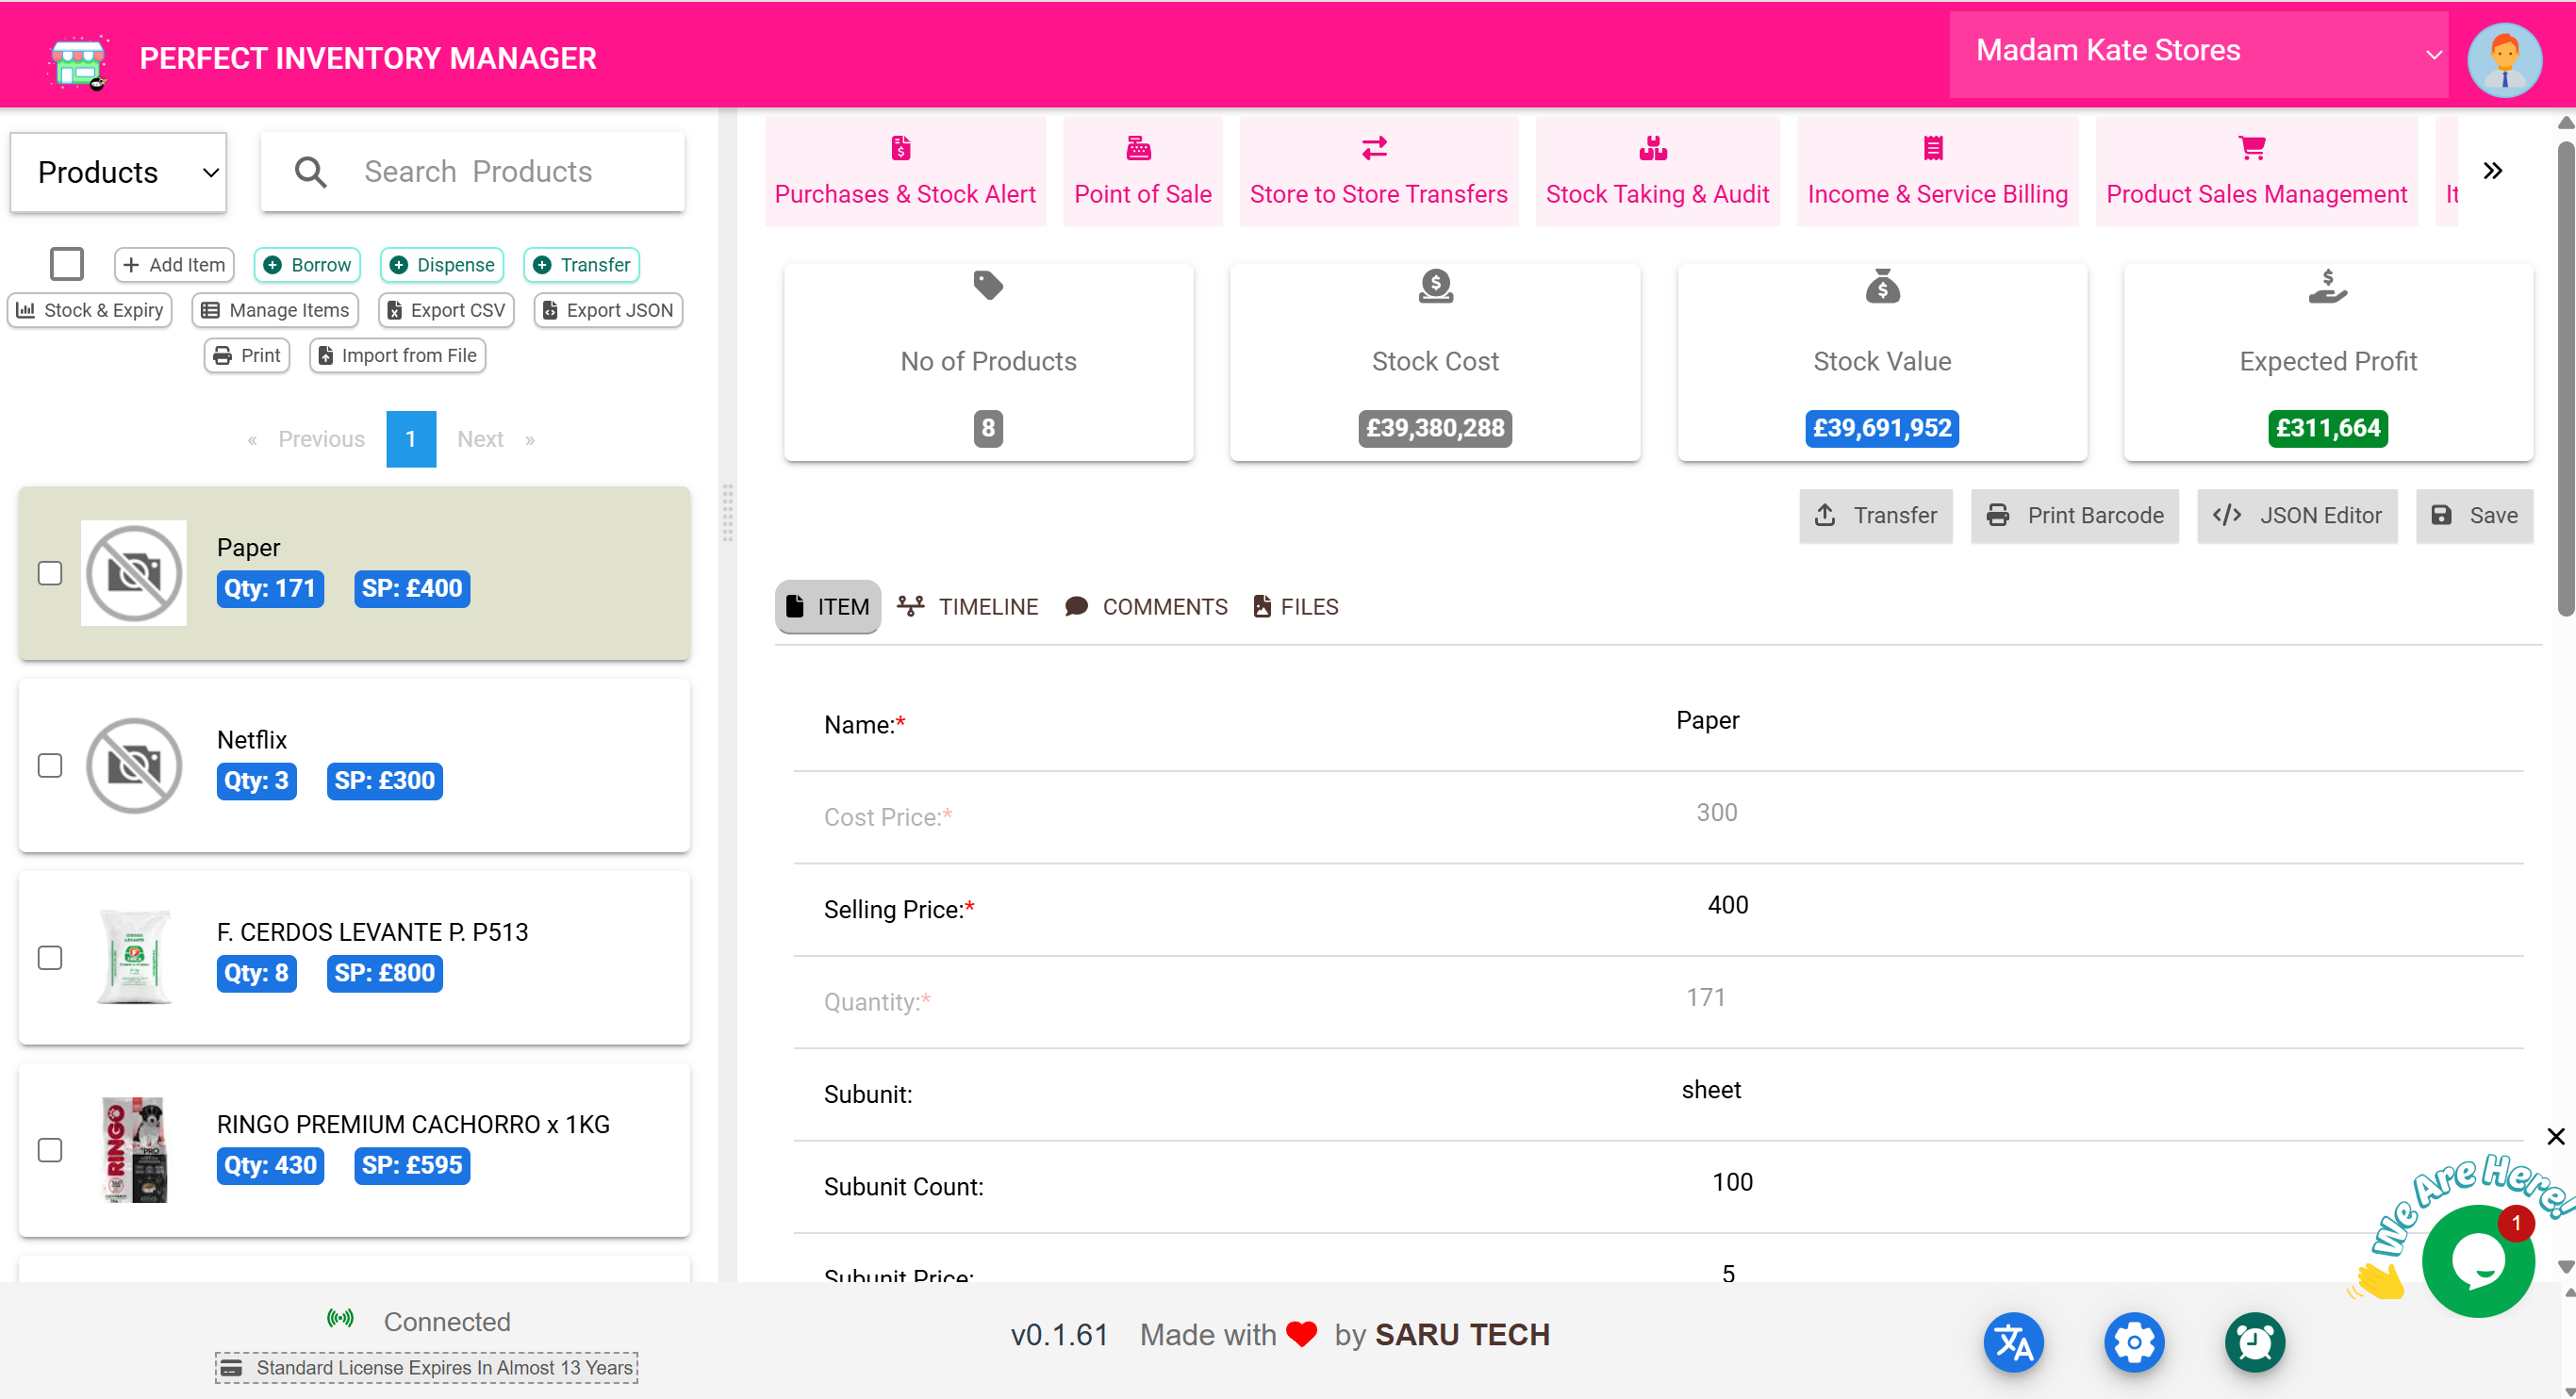
Products in the selected store are displayed as cards with name, image, quantity, expiry status, and other key info.
- Use the search bar to quickly find items by name, type, or category
- Color codes help flag low stock or soon-to-expire items
Example: Typing “Gluco” instantly pulls up “Glucose Strips.” You see there are 80 in stock and they expire in 45 days.
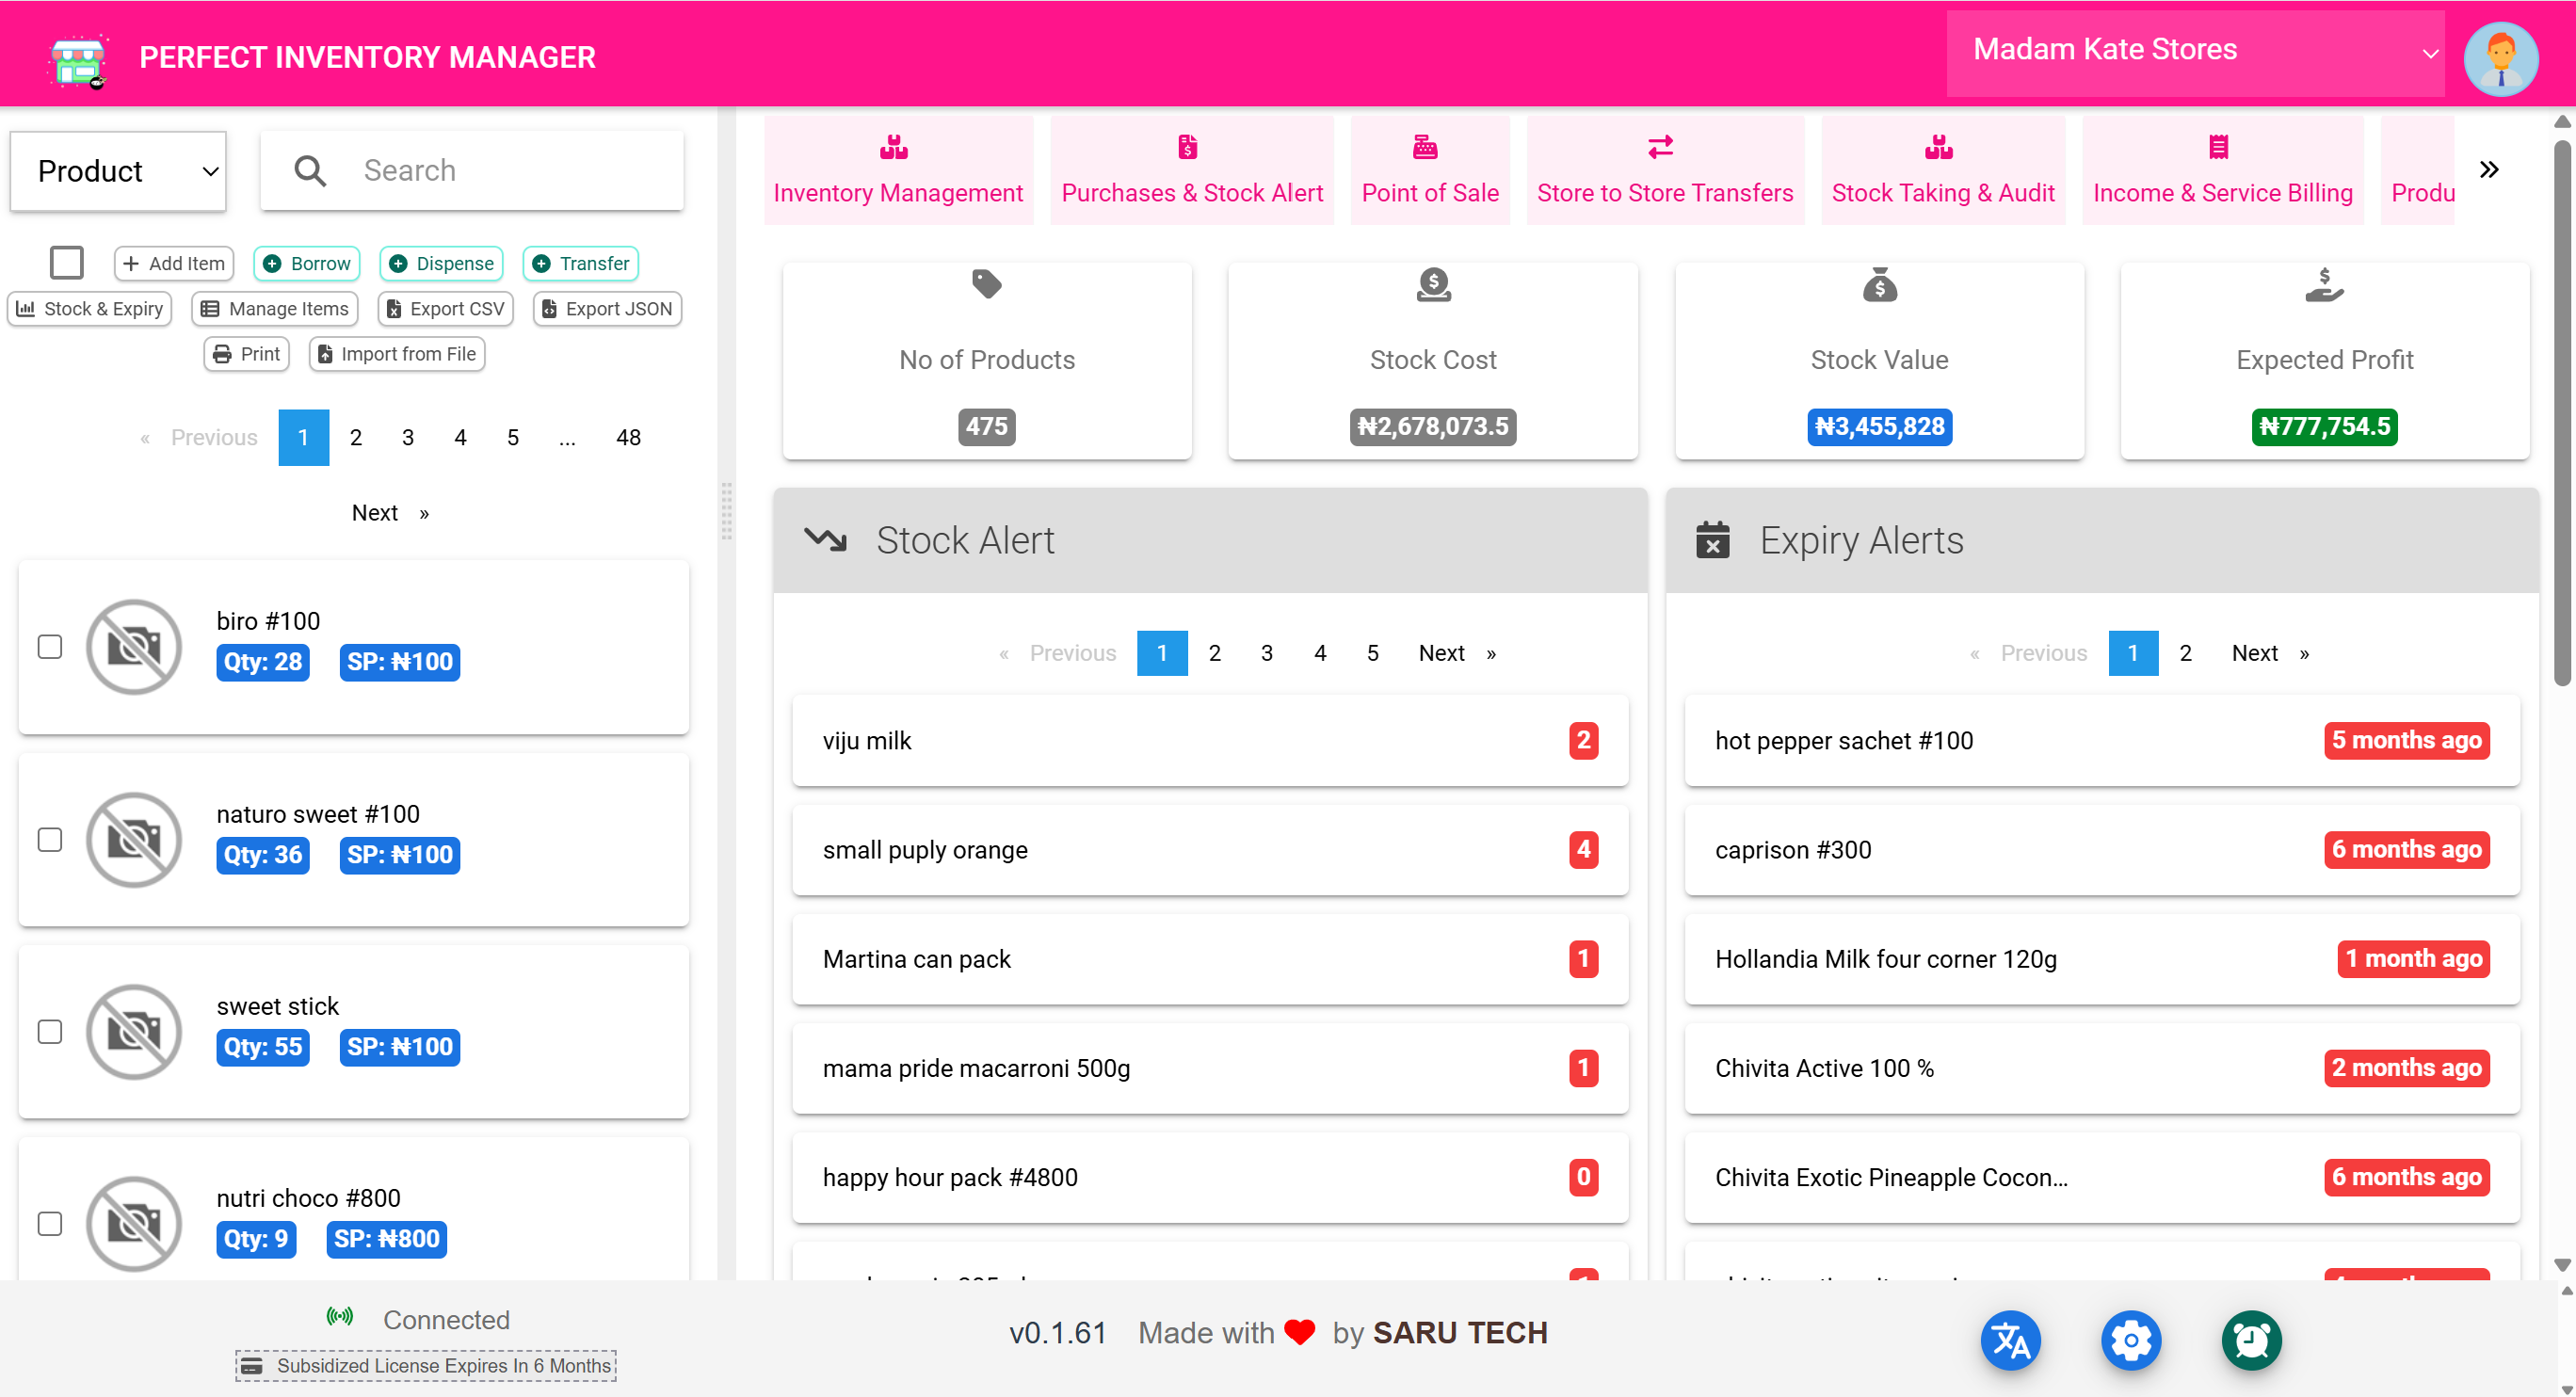
⚠️ Automatic Stock & Expiry Alerts
The system tracks:
- Items below alert threshold
- Products nearing expiry
Clicking the “Stock & Expiry” button gives you a focused list for proactive action.
Example: Pharmacy Supervisor checks this every morning and starts a Purchase order for items with red alerts.
🛠️ Inventory Action Buttons
Above the product list are several action buttons used daily by staff. These include:
- Add Item – for new products (not for restocking)
- Borrow – to issue items temporarily
- Dispense – for consumables or medications
- Transfer – move stock to another store
- Manage Items – bulk edit mode
- Import / Export – upload/download CSV or JSON
- Print – for physical audits or barcode printing
Each action opens its own wizard or modal, making it fast and intuitive to operate.
🔎 Product Detail View
Clicking any product opens a right-hand panel with four tabs:
- Item Details – edit names, units, expiry, barcode, and image
- Timeline – shows all inventory history for the item
- Comments – team notes, reminders, alerts
- Files – upload supplier docs, safety forms, or certificates
Additional tools include transferring that item, printing its barcode, and editing raw JSON for advanced users.
📚 Real-Life Examples
Dispense 5 syringes to a patient:
- Click Dispense
- Select “Syringe 5ml”
- Enter quantity
- Tag to patient or use-case
- Submit and print receipt
Transfer Gloves to Theatre Store:
- Click Transfer
- Select “Gloves”
- Choose destination store
- Enter quantity
- Submit — stock updates in both stores